Have you heard this saying, “If you fail to plan, then you plan to fail?” Or this one, “Bad planning on your part does not constitute an emergency on my part.” Maybe Winnie-the-Pooh (as written by A. A. Milne) said it best, “Organizing is what you do before you do something, so that when you do it, it is not all mixed up.”
As many of you began implementing the Tabor Rotation Framework you asked how I help schools plan for small-group, differentiated instruction. Here are some suggestions…
1. Gather Materials to assist with planning.
Some suggestions:
*All the data you can get your hands on
*Scope & Sequence, Time Lines from District or State
*Bring all the resources available such as textbooks, teacher’s guides, investigations, internet web sites, manipulative lists, old lesson plans, etc.
*Any information about the students’ interests and learning styles
*Public-Release tests from the state for your grade level and several grades above you
*A large year-long calendar
*Blank Tabor Rotation Planning Guide
*Skeleton planning guides
2. Give each participant an active role in the planning process so that you “sink or swim together.” One person could do the writing on the large chart paper or board, one person could be looking through the curriculum guides, one person could be looking through the paper resources, one person could be taking notes on the computer, or one person could be on the internet looking for resources.
3. Determine the most difficult concepts to learn/teach for the year.
*Think about why they are the most difficult.
*List the methods for instructing these concepts in the past.
*Compare your list with the rest of the school.
*Look at the disaggregated data from the school the students attend after they leave your school.
4. Locate the difficult concepts in your current scope and sequence.
*Plot these difficult concepts into a year-long school calendar so that you will know which concepts to teach in Teacher Time.
*Highlight concepts that will need to have mass or distributed practice for mastery.
5. Create a large “skeleton” planning guide for the first grading period. Put the most difficult concepts into the Teacher Time section of each week. Put testing dates, holidays, shortened days, field trips, etc. into the calendar.
6. Determine additional concepts for each week of instruction. Keep in mind the concrete-to representational-to abstract sequence for deep understanding of a concept.
*Place the concepts that lend themselves to the use of manipulatives in the Manipulative Station.
*Place the concepts that lend themselves to games in the Games Station.
*Place the concepts that have technology or other support in the Technology/Application Station.
7. Begin completion of the skeleton for the first week. Put the initials of the person in charge of gathering the information beside the activity.
a. Determine the Teacher Time content.
b. Determine the Manipulative, Games, and Technology/Application content.
c. List the important vocabulary for the concepts to be studied that week. Determine methods for instructing the vocabulary so that it is meaningful, applicable, and robust.
d. Place simple concepts in the Whole-Group Mini-Lessons. Determine methods for instruction that will be engaging.
e. List the connections students might make to these concepts in their own life.
f. List 1-2 comprehension strategies that lend themselves to the instruction occurring during the week.
g. Sketch concepts into an Application Menu for Thursday & Friday Independent/Partner Application.
h. Create Application Menu of Options or list alternate independent/partner activities for Days 4 & 5 when the teacher is meeting with Readiness Groups.
i. List concepts for each week on the Differentiated Readiness Sheet in preparation to go “Clipboard Cruising.”
j. Think about pre-assessment, formative assessment, and summative assessment needs. Place those into each week.
8. Repeat for the remaining weeks of the grading period.
Remember, “It pays to plan ahead. It wasn’t raining when Noah built the ark.”
“Occasionally in life there are those moments of unutterable fulfillment which cannot be completely explained by those symbols called words. Their meanings can only be articulated by the inaudible language of the heart.” -Martin Luther King, Jr.
Several teachers have written me asking about the scheduling of readiness groups and the vigor with which the readiness groups should be taught. As I wrote responses to those teachers I thought it might be helpful to some of you to write about what I think is most effective with the students who have not mastered the concepts you are studying.
A few years ago an administrator challenged me to inspire her teachers to improve their pedagogy for working with students who were labeled “at-risk” by the school district. I pondered the topic for weeks and struggled with how to inspire the teachers to change their current approach to working with those students. At the same time I was thinking on this topic, my husband and I were also working on our financial peace using the methods recommended by Dave Ramsey.
I woke up at 2am one night with the most logical connection between Dave Ramsey’s beliefs and my beliefs in students. When most people begin to pay off debt they start with the credit card or loan which has the highest interest and try to pay that one off first. Then they go to the credit card with the next highest interest. Dave Ramsey calls his approach the “Debt Snowball.” You pay off the least amount first then tackle the next one. The idea is to form an effective financial habit and to see the results of paying off the debts. It worked with us and now the only debt we have is our mortgage.
Here’s how I used Dave’s ideas…I entitled my workshop, “Overall Opportunity.” I settled on this title because I used the following quote to begin the training.
“Opportunity is missed by most people because it’s dressed up in overalls and looks like work.” -Thomas Edison
At the beginning of the workshop I drew an outline of the side of a mountain. I asked the teachers to visualize this mountain as the conceptual understandings and skill set of an at-risk student. When a student reaches the top of the mountain, then he or she is on grade level. I asked them to think about a specific student and describe some of their deficits and some of their assets.
I placed x’s at the bottom of the mountain which represented all the understandings the student was greatly lacking and the concepts the students should have mastered years earlier. There was a large deficit clump and it was at the very bottom of the mountain. At the top of the mountain we placed their assets. Near the top were the concepts the students had almost mastered. Half-way up the mountain were the concepts that were attached to interests of the student so they were easier to learn.
I then asked the teachers which concepts we began with when we were instructing these students. They all indicated that they began with the concepts that were the most challenging for the students—the ones at the bottom of the student’s mountain of success.
I asked them to think about teaching those students in a different way. First of all, I asked them to call them “At-Promise” instead of at-risk. I heard this term used by Carol Ann Tomlinson. It sounded so much better when I said it and I know it made me look at them differently.
Next, I asked them to think about starting in a different spot on the student’s mountain. Why not start at the top and then come down? I piggy-backed on Dave Ramsey’s term and called it the “Student’s Snowball of Success.” If we begin helping them with concepts they have almost mastered and help them understand the concept with automaticity, then they have almost immediate success. They have started their snowball down the mountain.
As the student goes down the mountain, they take their successes with them and build on them. Their challenges aren’t as big because their attitude has changed. Their self-esteem is changing. We are giving the student the opportunity to build on their assets instead of trying to push up the hill to the next deficit. It’s much harder to push a huge snowball up a mountain instead of rolling it down.
I could tell by the nodding in the audience and the “aha” looks on their faces that the teachers were beginning to visualize what I was saying. I continued the workshop with examples from history who built their snowballs of success: Wilma Rudolph, Abraham Lincoln, and Theodore Giesel. I told them about several of my students whose lives were transformed by beginning with their “close to the top” understandings/assets instead of their “at the bottom” misunderstandings/deficits. We used an Overall Opportunity Graphic Organizer to help us organize our strategic thinking differently.
What would happen if intervention groups spent at least 1/3 to 1/2 of their time working on what the students do well or the “least of their challenges”? Would a snowball of success begin its way down the mountain of achievement? I’d really like it if every educator who doubts this idea would work REALLY hard to implement it and prove me wrong!
“The secret of getting ahead is getting started. The secret of getting started is breaking your complex overwhelming tasks into small manageable tasks, and then starting on the first one.” –Mark Twain
“Every piece of the puzzle that doesn’t fit gets you closer to the answer.” – Cynthia Copeland Lewis
“Doctors and scientists said that breaking the four-minute mile was impossible, that one would die in the attempt. Thus, when I got up from the track after collapsing at the finish line, I figured I was dead.” – Roger Bannister, 1st runner to break 4-minute mile record
School is off to a running start and many of you have written asking for more specifics as you began implementing the Tabor Rotation Framework. This blog will answer some questions about assessment.
As a teacher, report card time was when I found reasons to reorganize my house and to clean out my garage. Assessment is still not my favorite topic because of its misuse. However, if it is used effectively and wisely as a tool to consistently inform the instructor and the learner, then it becomes invaluable. The information you gather about a student helps you piece together the puzzle of how to best help the student.
Assessment should inform you on how to change what you are teaching or the way you are teaching it to better meet the needs of your students.
“The key to wisdom is knowing all the right questions.” -John A. Simone Jr.
The previous quote is a great way to think about assessment. It places the responsibility on the teacher to ask the right questions instead of on the students to supply all the “right” answers. Let’s continue with some of your questions. Dennis, from Cibolo, TX, sent the following email:
“I attended your presentation at CAMT and loved it. I have wanted to implement centers and effective small groups in my class for years, but could never see how to put the pieces together. It has only been a few days, but it is working! I have three other math teachers with me in 5th grade. We each teach 3 periods of math with class sizes from 26-28. Thankfully, one of my compatriots is also fully on board with Tabor Rotation.
I do have one question. When do you fit in assessments, such as unit tests. Our plan right now is to make it brief and do it on a Monday in place of vocabulary, warm up, and the min-lesson. Any thoughts?”
This teacher’s desire to implement small groups, but not being able to see how to put the pieces together is the reason why I have continued to share the Tabor Rotation Framework with educators across the United States. Differentiated instruction is nothing new—ever heard of a one-room school house? Small groups are nothing new—ever been to the book corner? Tabor Rotation is a framework that takes all the best ideas for using small groups based on readiness, interests, and learning styles and helps the student learn the content through varied modalities or processes so they can “show what they know” through a meaningful product.
I was impressed that Dennis and his team went looking for a place to put assessment instead of giving up since it wasn’t “written specifically into the Tabor Rotation Framework.” [See the Tabor Rotation Planning Guide Example.] However, Dennis and his team did think of a practical place to put an assessment. They suggested that an assessment take the place of the whole-group time at the beginning of the week on Monday. Assessment could also take the place of the whole-group time on Friday.
There are other places in which assessment could easily be scheduled in the Tabor Rotation Framework. Look at the bolded, highlighted portions of the Tabor Rotation Planning Guide with Assessment. Assessment could also occur on Monday after the Vocabulary, Whole-Group Mini-Lesson, and Introduction of Stations. The remainder of the math block on Mondays could be used for assessment. During assessment weeks the Leadership Academy would be scheduled during the leaders and co-leaders lunch/recess time or at the beginning of school.
During Rotation on Days 2 & 3 assessment could be the task in the Application Station. Some teachers put the assessment on the computer and have the students complete and save. Some teachers give the students the assessment and privacy boards and have the students move somewhere in the room to take the test. If the students finish the assessment then they go straight to the additional activities which have been placed in the station of to the Technology portion of the station.
Assessment could be part of the students Application Menu of Options with Assessment on Days 4 and/or 5. After Vocabulary and Whole-Group Mini-Lesson the teacher gives the Application Menu of Options with Assessment. The largest portion of the Menu requires the students to take a test over the concepts which should have been mastered. After the student independently completes the test, then she may go on to other options on the Application Menu.
Thank you to all those who are continuing to do what is best for children—especially within the requirements of a school or district. As I close this post I have to add a few more quotes. Let me know if any of them give you an “AHA” moment…
“I don’t divide the world into the weak and the strong, or the successes and the failures, those who make it or those who don’t. I divide the world into learners and non-learners.” -Benjamin Barber
“The difference between school and life? In school, you’re taught a lesson and then given a test. In life, you’re given a test that teaches you a lesson.” -Tom Bodett
“The test of a good teacher is not how many questions he can ask his pupils that they will answer readily, but how many questions he inspires them to ask him which he finds it hard to answer.” -Alice Wellington Rollins
“All of us have moments in our lives that test our courage. Taking children into a house with a white carpet is one of them.” -Erma Bombeck [Had to add this test quote for a laugh—I have light-colored carpet!]
“Children need models more than they need critics.” -Joseph Joubert
It’s the beginning of a new school year. The students are ready to begin working on one of the most exciting mathematical concepts they’ll encounter this year…drum roll, please…WORD PROBLEMS! And, another drum roll, please…as your grade level increases, so do the number of steps in the word problems.
How do I teach word problems? How do I help my students complete word problems correctly? How do I get my students to try to solve word problems? These are common questions asked by teachers at all grade levels. I’m going to describe the most effective tool I’ve ever used for helping students understand and successfully solve word problems, but I have to give you some background information first.
For me, the challenge of teaching word problems really began back when I was in the 4th grade. My teacher asked the class to complete some word problems about Mr. Smith, Mr. Jones, and their driving. You know the problem:
“Mr. Smith drives from Smithville to Jonestown going 50 miles per hour. Mr. Jones drives from Jonestown to Smithville going 45 miles per hour. If the Smithville and Jonestown are 150 miles apart, when will the two cars intersect on the highway?”
As soon as I read that problem my 9-year-old brain began to think all kinds of things. Unfortunately, none of the things I was thinking had to do with solving the math problems. Here’s what I was thinking,
“I simply DON’T care when Mr. Smith and Mr. Jones get in their cars. I don’t care how fast they drive. And, I don’t care when their cars cross paths.”
I can’t remember any teacher, any textbook, or any situation making story problems engaging enough for me to want to work the problem. I was probably an overachiever type and worked the problem anyway so that I made a good grade. But most of the students with whom I have worked over the last two decades aren’t overachievers. However, these students will need to solve word problems for the rest of their lives so it’s my job to help them. More importantly, it’s my job to figure out how to excite them and engage them in the solving of word problems.
HOW DO I ENGAGE THE STUDENTS IN A MEANINGFUL, PURPOSEFUL WAY SO THAT THE TASK BECOMES ITS OWN REWARD?
When I taught 4th grade and my students were encountering word problems similar to one about Mr. Smith and Mr. Jones I approached it in such a way that my students couldn’t wait to solve more problems like it. Here’s how I did it.
First of all, I thought about the comprehension strategies I had been using in our balanced literacy block. [For more about these, read Harvey & Goudvis book, ”Strategies That Work.”] One of the key strategies for comprehending what you read is to have a text-to-self connection. If a learner can “connect” to what he is reading, then he’s more likely to comprehend and understand what he’s read. If this works for literacy, then it’s certainly going to work for mathematical word problems since the problem is one that is read. (I hope there are a lot of light bulbs going off in teachers’ heads right now as you’re making the connection from literacy to math.)
Part of the challenge of the Smith/Jones problem is that my students weren’t connecting to it. They aren’t car drivers and most of them are playing hand-held video games or listening to MP3 players, not calculating the times that their vehicle is crossing another vehicle’s path.
To help my students make this connection to the word problems I had to create a simulation. We went out into the newly waxed hallway and marked off 100 feet. To make everything as consistent as possible, we used the same car at each end and the same type of launch pad or ramp. There were student/police detectives all along the route of the two cars. The detectives were to determine where the two cars intersected paths and report this to the rest of the class.
The students took turns launching the cars, gathering data of the intersection of the cars, measuring the exact distances, and hypothesizing about the velocity of the model cars. The most exciting portion of our experiment was when the two cars not only intersected, but crashed into each other. The students LOVED it!
If you’re a science and math teacher, then you’re already seeing the connection from literacy to math to science. Interdisciplinary problem solving is real-world problem solving. The world doesn’t hand you a challenge and tell you to calculate the math in it and then hand it off to someone else to read it and then someone else to do the experimenting and finally to someone to spell the words correctly. (My speech about spelling lists that have no connection attached to them will have to be shared another day.)
This learning experience may seem like “fluff” to some people or like too much “play” to others. It is basing your students’ educational experiences on what is important to them. It’s the essence of how the brain learns. Educators such as Steven Webb, superintendent of Vancouver Public Schools, assert that play is essential. In his article, “Educating Children in the New Millennium: Child’s Play,” Steven says,
“…our daughter is constructing mental “maps” based on her experiences. Jean Piaget, the child psychologist, described this early-childhood development stage as “pre-operational.” He theorized that a child’s mental models, or cognitive structures, are based on the child’s activities; engagement makes meaning. Free, unstructured play is healthy and, in fact, essential for helping children reach important social, emotional, and cognitive developmental milestones. Piaget’s theory is based on the idea that the developing child builds cognitive structures known as mental maps or schemes for understanding and responding to physical experiences.
What is known as constructivism postulates that by reflecting on our experiences, we develop our own understanding of the world. Each of us generates our own mental models to make sense of our experiences. Learning, therefore, is the process of adjusting our mental models to accommodate new experiences. Constructivist teaching focuses on creating experiential and engaging activities for students, such as participating in a science fair. This kind of learning also involves an element of play.
Imagine what is possible when a community focuses its development efforts on attracting the creative class and building the creative economy.”
After cultivating the curiosity in my students, arranging time for them to “play” with the mathematical concepts, and helping them gather the data needed to solve the problem, we went to a story map to help us understand what we were trying to solve. In our small-group guided reading instruction we had already used a story map for the story of Goldilocks and the three bears [Goldilocks & the Three Bears: An Analyzing Perspectives Task]. We read several different versions of the story and created a story map for each. We also made a Venn Diagram comparison of our favorite versions [Venn Diagram with Characteristics]. Now we were about the use all those effective strategies to help us solve our story problem.
Together, we completed the Story Problem Map for one of the story problems for which we had already participated in a scenario with our model cars. I was amazed, but not surprised that the students were able to complete the story map and talk about the essential portions of the word problem. The problem wasn’t abstract anymore. The students were ENGAGED, CONNECTED, and ready to SOLVE!
Every time I have used the Story Problem Map I have had incredible success—especially if I have helped the students make a connection to the story problem. Let me know how it works for you.
“There are children playing in the street who could solve some of my top problems in physics, because they have modes of sensory perception that I lost long ago.” -J. Robert Oppenheimer
Thank you to all the educators who have been visiting my website, using the FREE RESOURCES, requesting more information, and asking really good questions. This post will address some of the questions I’ve received over the last few weeks about motivating students when using student-directed small groups.
“A champion needs a motivation above and beyond winning.” -Pat Riley
Just the fact that many of you are asking about team points indicates that you’re ready to use the TABOR ROTATION Framework to help you simplify small-group, differentiated instruction in your mathematics block. Giving points gives students a base “salary” so they are not “coming to work for free.” The point system is a way of paying students adequately and fairly for the work they are doing so that we may continue to higher plains of motivation.
Here are the steps I recommend for beginning the process of using team points:
1. The teacher groups the students into 4 heterogeneous groups. Make sure that the groups you create are ones who will work well together with mixed-readiness levels.
2. Appoint team roles for the group.
3. Have the team give themselves a mathematical name which comes from the list of terms for that grading period. Each team member should know how to explain to someone what their team name represents.
4. Explain to the entire class that each team will be working for 30 points during math time. Every time the team reaches 30 points they receive their positive consequence or commission.
5. The class can determine what they would like to work toward each time they reach 30 points. The reward shouldn’t be costly. The most favorite reward has been 30 minutes of math game time while the rest of the class is doing other work.
6. After the team receives its reward the points are wiped clean and the process begins again.
Now that your class has determined the positive consequence of making good choices, let’s talk about how to help the students manage the point system. The team names are listed on the Tabor Rotation Team Point Sheet. Keep a pad of post-it notes in the TABOR ROTATION Supply Basket.
At the beginning of each math period the timekeeper from each group gets a post-it note and pencil. The timekeeper sticks this note to the front of their TABOR ROTATION Math Folder. As the team receives points, the timekeeper notes the amount on the note.
What types of behavior do you want to see? Initially, I used mass practice and recognition of good choices. I’ll give points for something about every 5 minutes. I’ll also give 3-5 points at a time, depending on how badly I want to see the behavior occur in my classroom. After a month or so of using the framework and seeing the correct behavior, I can begin distributed practice and distributed recognition.
I might give points for the following:
*Using whisper voices.
*Listening to your leader and co-leader.
*Following directions.
*Staying on task.
*Cleaning up your area.
*Making smooth transitions to the next station.
Basically, if there’s a behavior you want to see in your students, then you should model it, recognize it, and give points for it. When math time is over, the timekeeper records the number of points earned by her team in the correct square. The timekeeper is also in charge of giving a note to the teacher when his team has reached 30 points.
However, this type of extrinsic motivation will not lead to meaningful engagement of students. In fact, if you only use points and this type of “carrot” motivation, then the performance of your students will actually decrease—not increase. If this has gotten your attention, keep reading.
The reason why Tabor Rotation engages and motivates students isn’t just because of the points I give away. It’s because the framework provides students with repeated opportunities to have autonomy, mastery, and purpose. Dan Pink does a fantastic job of explaining the science of motivation. It’s worth the 20 minutes of viewing time to help you understand how to cultivate a classroom community of students at high motivation level. [http://www.ted.com/talks/dan_pink_on_motivation.html]
James Middleton, in “A Study of Intrinsic Motivation in the Mathematics Classroom: A Personal Constructs Approach,” offers a model for using intrinsic motivation in mathematics that challenges teachers to provide teaching and learning activities that are both stimulating and offer students a degree of personal control. The study also includes a list of ways teachers can develop and cultivate intrinsic motivation in the math classroom. [http://cft.vanderbilt.edu/teaching-guides/interactions/motivating-students/#model]
Tabor Rotation does this through varying the modalities by which a student experiences a concept in the Tabor Rotation Stations and in the readiness groups which are planned with the students’ readiness levels, interests, and learning styles in mind.
I am on a mission to help change the way our classrooms approach the teaching and learning of mathematics. Part of my mission is to encourage teachers to think about and approach motivation in a scientifically effective way. I hope this blog has done just that!
“It’s not my job to motivate players. They bring extraordinary motivation to our program. It’s my job not to de-motivate them.” -Lou Holtz
It’s the middle of July and right about now there are thousands of children repeating, “What can I do now? I’m bored.” Here are a few mathematically meaningful and engaging ways to resolve that situation.
Wait until it’s a really HOT day. Crack an egg on a part of the sidewalk that’s in the sun. Predict what you think will happen. Check back on the egg every 15 minutes. Draw a picture of what it looks like. Write a paragraph from the egg’s point of view.
List 25 cities in the United States, or the world you would like to visit. Find them on a map. Calculate the mileage from your hometown to each of the cities. List the cities in order from least distance away to greatest distance away. If you’re 10 or older, calculate the average distance away from you to the cities. Find the range, median, and mode for the distances. Share this information with a friend.
Divide the back of a box or a large sheet of paper into four sections. Label the sections ONES, TENS, HUNDREDS, THOUSANDS. Use old newspapers, magazines, or clip art to find pictures of items that come in sets of ONES, TENS, HUNDREDS, and THOUSANDS. See how many pictures you can find in 30 minutes. Have a sibling or caregiver do a collection, too. Compare your collection with theirs. Write 5 factual statements about the collections and 5 opinions.
Collect a menu from any restaurant you visit. Write at least 5 word problems using the menu as a source of information. Begin a “Menu of Math Challenges” and write 5 word problems for every restaurant menu you can collect. Bind the problems and make a book out of them. Write the answers in the back of the book and give to family members and friends to see if they can solve the problems.
Look at today’s date on the calendar. Think of at least 10-20 different ways to represent that number. For instance, today is the 21st of July. I could represent the number 21 with 4 nickels and 1 penny. I could also represent the number 21 by having 11 pairs of socks with one sock missing.
This last one is for the adults from comedian Stephen Wright. “When I get real bored, I like to drive downtown and get a great parking spot, then sit in my car and count how many people ask me if I’m leaving.” So…can you really fry an egg on the sidewalk? Don’t just sit there—go try it and let me know what happens!
Questions about how to implement Tabor Rotation right away--I LOVE it!
I’m sending a WOO HOO to all the educators who attended the Tabor Rotation sessions at CAMT 2010 in San Antonio this past weekend! Your attendance and enthusiasm indicated your desire to more effectively implement small-group, differentiated instruction in mathematics. Many of you requested the Tabor Rotation Time Line for Elementary School. I’ve posted it in this blog [Tabor Rotation Timeline for Elementary Schools] and in the FREE RESOURCES section of my website. More FREE RESOURCES will be uploaded every week. If you let me know what you need to begin the school year using, then I can make it available to you.
A great, big THANK YOU goes to the directors of CAMT who asked me to present and to all the volunteers who made the conference a success. The volunteers assigned to my sessions were incredibly nice, extremely helpful, and very supportive.
Thank you to all the CAMT participants who attended my morning session on Tabor Rotation–what a FANTASTIC audience!!! I’ll be posting the time line and other requested resources tonight.
I’m at CAMT all day Friday and will be available to answer questions, share ideas, or discuss professional development possibilities. Send me an email and let’s plan where to meet. I’d really enjoy helping you get started on your journey of implementing simplified, small-group, differentiated instruction in mathematics.
One of the most frequently “hit” blogs I’ve ever posted continues to be, Irregular! Impossible? Important! Area & Perimeter of Irregular Polygons. [https://glennatabor.com/2010/02/irregular-impossible-important-area-perimeter-of-irregular-polygons/]. My summer mission continues to be helping parents make creative linkages between mathematical concepts and every day activities. Our children are switching rooms and the oldest is rearranging her furniture next week…so get ready for practical application of area and perimeter of regular and irregular polygons…
As I was doing more research on irregular polygons by reading several articles, watching videos, and reviewing some of my own activities, I thought about the parents who might want to help lay the foundation for their child to understand complex concepts such as polygons, irregular polygons, area, and perimeter. Where does a parent begin? I’ve never found a simple book for parents about the topic. As a kindergarten, first grade, and second grade teacher, I don’t remember anyone teaching me how to help my students make this leap in the upper grades. I’m blogging today for parents and teachers who want to know more.
Some examples of 1st grade math standards in geometry are:
The student can describe and identify two-dimensional geometric figures, including circles, triangles, rectangles, and squares (a special type of rectangle).
The student can describe and identify two- and three-dimensional geometric figures in order to sort them according to a given attribute using informal and formal language.
The complexity of the above standards increases each year. By the time students reach 5th grade the standards read like this:
Students will identify and compare properties of two-dimensional figures (circles, triangles acute, right, obtuse, scalene, isosceles, equilateral], quadrilaterals [square, rectangle, rhombus, parallelogram, trapezoid], regular/irregular polygons), and will apply these properties and figures to solve real-world and mathematical problems.
Students will describe and provide examples of basic geometric elements that include points, segments, rays, lines, angles, and planes and will use these elements in real-world and mathematical problems.
So, where would I start if I was a parent wanting to help my child build a strong foundation for understanding geometric figures? ATTRIBUTES!
With my own children it began with the book, “Frog and Toad are Friends” by Arnold Lobel. One of the stories in the book is called, “The Lost Button.” Toad loses a button and his good friend, Frog, tries to help him find it by retracing their steps on a walk. Each time Frog holds up a button which might be Toad’s lost one, Toad explains why it couldn’t be his button. “That’s not my button. My button is big. That button is little.”
(VIN: Very Important Note: I use this same picture book when working with 3rd – 8th graders. They like being read to and they still enjoy picture books. (I do, too, and am more likely to buy a picture book than any other kind!)
(AVIN: Another Very Important Note: If you have a 9 to 12-year-old child—KEEP READING! Children of all ages need meaningful, concrete experiences with geometric figures and making comparisons using their properties. Begin with the same activities but layer on the level of difficulty as they develop a deeper understanding of the concepts. I’ll make some suggestions throughout the blog.)
I’m also a believer in cultivating literacy in children, so before we begin reading a book, my children and I look at the pictures and take a picture walk by describing what might be happening in the pictures. We talk about whether or not it’s real (non-fiction) or not real (fiction) and why. We read the story all the way through the first time without stopping to think about the mathematical concepts.
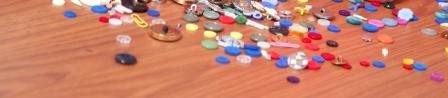
Before we read the story the second time, we are “buttonly” prepared. The children and I have bags of buttons I purchased from the local craft/discount/dollar store. I also bring my special button collection. (Keep these buttons in handy places, because they are incredibly useful mathematical tools.) For younger children, or those of us who are organizationally challenged, you might want to let your child use a paper plate or place mat under their buttons.
My personal button collection is kept in an old, round metal scotch tape container. I inherited the buttons from my mom who inherited the buttons from her mom. There is a story behind every button in the container and my children love to hear each of the stories. My button treasures are always a favorite with my students, too. The personal connections they feel to the buttons have begun many invaluable conversations in my classroom. I’m getting sidetracked and nostalgic, aren’t I? Back to the topic…
As we read the story, we listen for the things Toad yells about the buttons. These are called characteristics or attributes. Don’t be afraid to use these accurate, multisyllabic words with your child. My children and my students were always fascinated with their use and mastery of “big” words.
As the attributes appear in the story, I write them down on a piece of paper. After I write them down, I find a button in my pile which has that attribute. If the attribute is small, then I find a small button and put it next to the card. Have your child find the small buttons in their collection. As they find small buttons, ask them how they know it is small. Be sure and listen to what they say and not judge their responses. Remember, it’s not whether your child is “right” or “wrong” according to what you think. You want them to think and share mathematically.
Keep repeating this process with new attributes which are mentioned in the story. Ask your child to look at their buttons and determine attributes that weren’t mentioned in the story. For older children, encourage them to use complex adjectives for the attribute categories. A 3rd or 4th grader might use the attributes of “triangular,” “right angled,” or “vibrant.”
Are you beginning to see the connection to the geometric standards listed above? Your child can pick up a button and tell you it’s a big, white, button that looks like a circle. Doesn’t that sound like more fun than holding up flashcards with shapes on them? My children’s, and my student’s, concrete experiences with buttons were always engaging, meaningful, and FUN! Much better than holding up flashcards and repeating the attributes of the two- and three-dimensional figures!
Make a circle using yarn, the outside edge of a paper plate, or a hula hoop. My children’s favorite was the hula hoop. Give your child a collection of buttons and some sticky notes. Have your child brainstorm an attribute. Younger children usually begin with color words. After using a few color words, encourage them to think of a different attribute such as “Has 2 holes.” If your child is an emerging writer, then you can write the attribute on the sticky note for them.
Place the sticky note with the attribute description inside the ring. Let’s say the first attribute is “large.” Have your child observe their buttons and determine if the button they are holding goes in the ring because it is large or goes outside of the ring because it is not. The size words of small, medium, and large always bring about an interesting discussion if I’m allowing my children to use inductive reasoning on their own. How big is large? How big is small? How big is medium? Why? Most children find that the best way to determine if it’s a particular size is to find a button they feel best represents that attribute and measure other buttons according to the model.
Keep changing the attributes and finding the buttons which are in or out of the ring. After your child has used the concrete single ring, then you can print out the Single Ring Venn Diagram for them to use. For more information about what exactly is a Venn Diagram you may want to follow the links below:
If your child is able to quickly place buttons in the single ring and can explain why she made the choices she made, then she is ready to use a double-ring Venn Diagram. The double-ring Venn layers on the complexity of thinking about two attributes at once. I have successfully given this lesson hundreds of times with children as young as 3 and as 8th grade. I always get the same results when I allow them to discover how to compare and contrast and how a Venn Diagram might be useful. This also worked perfectly with my own children.
Here are the steps. If you’re a visual learner like I am, then you may want to print out the Introduction to Venn Diagrams.
Have ready at least 2-3 ways of making a circle and pieces of paper or index cards. You can use pieces of yarn, lids or paper plates with only ½-inch edges remaining, hula hoops, etc.
Give each child a set of buttons. Have them spread the buttons out in front of them on a placemat.
Allow and encourage each child to explore their buttons. Ask each child questions about their buttons. Have each child partner up with someone next to them and show them their favorite button and tell them why it is their favorite button.
As the children are discussing their buttons, ask them if you may write down words they use to describe their buttons. Remind them that these are attributes. Place these cards in the middle of the work area.
Make two rings that are separate and not touching, but within 2-3 inches of each other.
Ask someone to select one of the attribute cards and place it inside one of the rings. If there’s just one child, ask them to place an attribute card into each ring. Example: One ring has the attribute card of red and the other ring as the attribute card of round.
Encourage the children to talk about each of the attributes and to find a button or buttons which match the attribute.
Ask a child to come a place a button where it belongs. It will be tempting to help guide them or do it for them—RESIST—it’s important that they use deductive reasoning to determine placement of the button! Example: Your child is holding his first button to place. It is red and is shaped like a square. He places it confidently in the ring with the red attribute card.As he is thinking you may want to encourage him to look at the Red Attribute Ring, look at his button, and ask himself, “Is it red?” As he looks at the Round Attribute Ring, he looks at his button and asks himself, “Is it round?” If the answer was yes to one and no to the other, then he knows where to place his button.Example: The second button to be placed is blue and is round. The child asks himself the questions, “Is it red?” It’s not, so he asks himself, “Is it round?” It is round, so he confidently places that blue, round button in the ring which has the round attribute card.
If the child is having difficulty placing the buttons, ask the question of the group, “What can we do?” Try all of their suggestions. Example: The third button is the “thinking” button. It is a large, red, round button. Ask the child to tell you all about the button they are holding. Elicit the as many attributes as you can. If the child is unable to think of more than one attribute, then ask guiding questions.
After listing the attributes of his button, the child immediately goes and places it in the red attribute ring. If there are other children in the group, then one will almost always say, “Wait a minute! That button’s round, too!” What occurs next is my favorite part of this introduction to comparative thinking. You look at the children and ask, “What can we do? The button is red and the button is round.” One child suggests that you place the rings next to each other and balance the button on both rings. The child who brought the button to be placed asks if he can put it back and find another button. You answer no and ask for more ideas.
Eventually, a child will suggest to put the rings over each other and leave a space in the middle for the red and round button.
Continue this process with additional buttons. Change the attributes in the two rings and do it some more. The energy that is released during this activity is amazing! Every time I do this in a demonstration lesson with students the teachers sit at the back and shake their heads.
For those of you who use the Tabor Rotation Framework, this activity is perfect for the small-group math instruction that occurs in Teacher Time and can be continued in the Manipulative Station. The first time I did this activity with 3rd graders and used gourds from pumpkin patch. The last time I did this with pre-K students I used buttons. What happened in the example above happened with both groups.
Now that you’ve given your children a chance to discover and deductively reason why one might use a Venn Diagram to organization oncrete objects, you might want to print out the Venn Diagram with two rings and let them use it to explore placement of bags of buttons. Give them sticky notes and have them write attribute words on them. If your child wants a greater challenge, then have them use the Triple Ring Venn and determine placement of buttons using three attributes.
When your child has mastered the placement of concrete objects, have them write the numbers 0 to 100 on small cards. Ask them to list number attributes on sticky notes to place inside the rings. These attributes could be “multiple of 5” or “even number.” Have them place the numbers where they belong- inside the “multiple of 5” ring, the “even number” ring, or in the intersecting portion of both rings meaning it’s “both a multiple of 5 and an even number.”
Since so many of you integrate your interaction with your child, you might want to read the lesson for the story, “The Lost Button,” created by Rebecca Bayer from Mount Hope Elementary. Rebecca includes questions you might ask before, during, and after reading the story. She also lists many additional concepts, besides attributes, which are part of this story.
I hope the teachers who are reading this blog are seeing that this set of activities can easily become a lesson about estimation, measurement, attributes, graphic organizers, and data collection. All of the tools included in this blog are also on the FREE RESOURCES page. Print them out and use them. If you’d like to know more about how to expand your students’ thinking about additional concepts, send me a comment or a question.
Just two more weeks and I’ll be in San Antonio! See you at CAMT 2010 on Thursday, July 15, 8-9:30am and 3-4:30pm!
This fall I’ll be heading to north Texas, central Texas, and south Texas. Being a native Texan, I can’t wait to eat the food in every region and share great ideas along the way!
I’m glad the parent blogs have been so well received! If you’re an educator reading this blog you can use all of the ideals with your students in small groups. The concepts explored in today’s blog deal with the prerequisites for counting and are appropriate for Pre-K, K, and 1st grades.
Some of you asked for just a few ideas at a time. Others asked for as much as they can get. To provide for all, I’ll begin with a simple explanation of each activity and how it helps develop number sense. If you’d like a more in-depth explanation, then keep reading the rest of the blog.
If your brain starts to hurt at any point, then just stop reading and go have fun completing the activity with your child.
On Tuesday I provided a link on the FREE RESOURCES page of my website for the “Number Scavenger Hunt.” I received emails asking for more information about how to use this activity. I also received questions about counting. This activity helps with counting and helps set the stage for the understanding of number.
The “Number Scavenger Hunt” asks the child to find sets of objects between numbers which are familiar to the child. This activity helps children use the stable order rule which says the words used to count must be the same string from one count to the next. It also helps with one-to-one correspondence which requires each counting word to be paired with exactly one object being counted. If a child chooses a set of objects which are not the same, then the abstraction rule is also being cultivated by making the child aware that the objects in a group to be counted do not all have to be the same.
Scenario 1/Early Stage of Number Sense:Brooklyn and her mom decide to “hunt” for objects between the numbers 1 and 20. Together they think about how much time it might take them to find all the sets of objects and they record that estimate on the paper.
(VIN: Very Important Note: If Brooklyn is in the pre-writing stage, then her mom will do most of the recording of abstract symbols and letters Brooklyn is unable to write. The mom can let Brooklyn draw pictures of the objects to represent the amount. If Brooklyn has to do all the writing herself, then the activity becomes a hand-eye coordination lesson in penmanship instead of a time to develop a deeper understanding about mathematics.)
Brooklyn quickly finds one object—her dog. She simply counts to 1 and says it out loud. To practice her one-to-one correspondence, she touches the dog and says, “1.” Brooklyn knows how to make a straight line from top to bottom, so she writes the number 1 in the box. She can write the word dog, but it takes her a long time, so she draws a circle with ears and a nose. She also puts a few spots on the dog’s face since her dog’s name is Spot.
Brooklyn and her mom continue this process with the remaining numbers. They practice:
1. Finding a set of objects that might have that amount. (Great practice in estimation, guess and check problem solving, and relative magnitude of numbers.)
2. Touching the objects while counting out loud in a stable. They do this several times together, and then Brooklyn tries counting the objects on her own.
3. After agreeing that there are a specific number of objects in the group, then they record the number and the description or picture of the objects they counted.
4. Brooklyn’s mother encourages Brooklyn to find varied sets of objects such as a toy, a shirt, and two shoes. This is a set of 4 objects. She wants her daughter to abstract and realize that all the objects in a set don’t have to be the same.
Brooklyn is engaged and fascinated by her ability to “think like a mathematician.” But, after about an hour Brooklyn is thirsty and hungry and her mom is hot. That’s when her mom stops for the day and comes back to it the next day. The focus is not on the completion of the scavenger hunt, but the on-going process of developing a good sense about numbers.
Scenario 2/Developing Stage of Number Sense: Casey knows how to count all the way to 100, but he gets a little confused with numbers like fifteen and all the numbers in the 40’s. It impresses family and friends when Casey can count by tens to the number 100. But, his dad isn’t sure if Casey truly understands what the numbers represent or if he has memorized the stable order of the numbers he’s repeating. Casey says the numbers like he’s chanting a rap song.
They decide to “piggy-back” on “The Number Scavenger Hunt” idea and become number detectives. Together they decide to find the tens throughout the week and devote an entire day to finding that number. They make Monday the day to find sets of 10. Tuesday is for finding sets of 20, Wednesday sets of 30, Thursday sets of 40, and Friday sets of 50.
Wherever they go and whatever they do, they look for groups of their ten for that day. Casey is going into 1st grade, so he knows how to write his numbers. He carries a clipboard with him to record what they find. On Monday, Ten Day, Casey counts the number of letters on every street sign. He is thrilled every time he finds a sign with ten letters on it. He wants to go with his grandmother to the grocery store because he knows there are sets of 10 everywhere!
By the time the week is over, Casey has developed a good “feel” for his tens. When someone asks him about the number 20 he doesn’t just try to picture the abstract mathematical symbol for 20, but he pictures the 20 different kinds of Cheerios that were on one aisle of the grocery store. He thinks about the 20 pieces of pasta that were left in his bowl when he was eating macaroni and cheese. He truly understands and can explain to others that there can be 20 goldfish crackers on his plate, 20 cars in a parking lot, and 20 different pieces of trail mix.
Brooklyn’s Mom and Casey’s dad know that one of the most powerful mathematical tools they can give their children are concrete experiences with numbers. These simple activities did just that!
For those of you who want to jump off the “high dive” into a deeper understanding of counting…keep reading about the prerequisites.
The STABLE ORDER RULE says that the words used in counting must be the same string of words from one count to the next. This principle usually develops before the child knows the correct string of words. The child may consistently count “1, 3, 5, 64” every time she counts 4 objects in a set. Practicing the correct counting string, in an engaging and meaningful way, will help a child self-correct.
ONE-TO-ONE CORRESPONDENCE means that each counting word must be paired with exactly one object being counted. When children initially begin to count, they may skip over an object or count the same object more than once. You may want to give your children sets of objects they can move from one location to another as they count. This concrete manipulation allows more of the brain to record what is being learned into long-term memory.
When my children were preschoolers, I used setting the table to practice this prerequisite at every meal. We used paper and plastic so nothing would be broken. (As a bonus it also made cleaning up much easier.) My son would take all 5 plates and walk around the table placing them and counting, “1, 2, 3, 4, 5.” He would repeat this with the napkins, eating utensils, and cups.
THE ABSTRACTION RULE states that all the objects in a group to be counted do not all have to be the same. When you count sets of objects with your child, try to expose her to varied compositions of objects within a set or group. Have them put a book with a toy and a cup. Expose them to sets which have large objects, sets which have small objects, and sets which are mixed.
Be sure to count sets of objects left-to-right and right to left. This IRRELEVANCE-ORDER RULE stated that you can count a set in any order and still get the same result. Ask your child to count beginning on the left. When your child is sure she knows how many objects are in the set, ask her if it will be the same when she counts from the right. This rule is also vital for the beginning stages of algebraic thinking. We’ll talk more about algebraic thinking in the July blogs.
For those of you who master these activities and want more, I’m adding several more FREE RESOURCES for parents. The Place Value Mat can be used to help your child organize his counting of beans for the Bean Stick Activity. The child puts one bean at a time into the ten frame in the one’s section of the chart. When he has ten, then he puts ten dots of glue on the popsicle stick and transfers the ten beans to make a ten stick.
Band Together is a game your family can play to build on the concepts being developed by creating bean sticks. This game has players rolling a number generator (die) and taking that number of straws. When a player has 10 straws, then they ask for a “band” to make a ten and have to sing or hum part of a song to get their rubber band. Using music is a way to help both sides of your brain learn a concept. More about this in future blogs…
I can’t wait to hear from all of you who try these activities! More fun ideas on Friday…